Version 1.0 - Last Updated: 15 Jul 2026
SIS LLE guidance
Fee and Credit CoC — expected delivery 01.12.2026
You should only use a Fee and Credit CoC when a student’s record appears in SIS and the fee or credit amount, or both are incorrect.
You can create a CoC from the CoC worklist, the Detailed application Information page or the Create CoC page. You can also create CoCs in bulk by uploading a csv. This guide will tell you how to create a CoC from the Create CoC page.
You should use the Fee and Credit CoC to amend the number of credits or credit value a student is undertaking.
When you confirm registration, you'll also need to confirm the credits these students will be studying in each course year. You can use the Fee and Credit CoC to tell us about changes to these credit values. You can do this either:
- before you confirm registration
- during the year following registration confirmation
You can create a CoC manually from the LLE Applications area. You can also create them in bulk by uploading a csv file. This guide will tell you how to use the Create CoC function. If you'd like the technical specification with information on the bulk upload process, please refer to the documents on the HE Gateway.
- Go to the SIS Home page and select LLE Applications
- Search for your student with the search options available
- Select Display Results

- Select the Create button

- Select Fee and Credit from the Change of Circumstance Type dropdown
- Select Continue
- The student’s details will be automatically populated
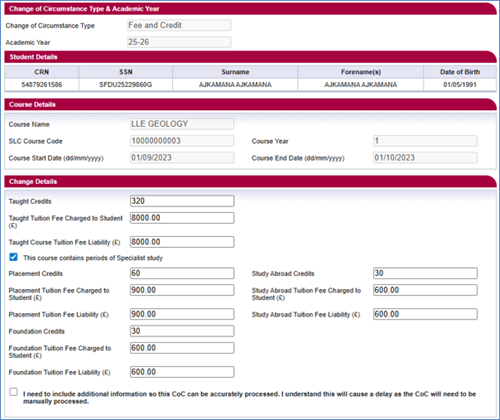
- If you need to add additional information to this CoC, you must select the checkbox after the line saying, 'I need to include additional information so this CoC can be accurately processed. I understand that this will cause a delay as the CoC will need to be manually processed'. This will appear once you tick the box.
- When you've entered all the details for the CoC, you must now select a contact for the CoC. This will be a registered person at your university or college who we can contact about this CoC. Use the radio buttons within the Contact Details section to select the contact.
- Select Submit