Version 1.0 - Last Updated: 15 Jul 2026
SIS LLE guidance
Suspension CoC — Early January
You should use a Suspension CoC when a student takes an agreed leave of absence and plans to return in the future.
You can create a CoC manually from the LLE Applications area. You can also create them in bulk by uploading a csv file. This guide will tell you how to use the Create CoC function. If you’d like the technical specification with information on the bulk upload process, please refer to document on the HE Gateway.
- Go to the SIS Homepage and select LLE Applications
- This will open the LLE Applications page
- Search for your student with the search options available
- Select Display Results

- Select the Create button in the Create CoC column

- Select Suspension from the Change of Circumstance Type dropdown
- Select Continue
- The student’s details will be automatically populated
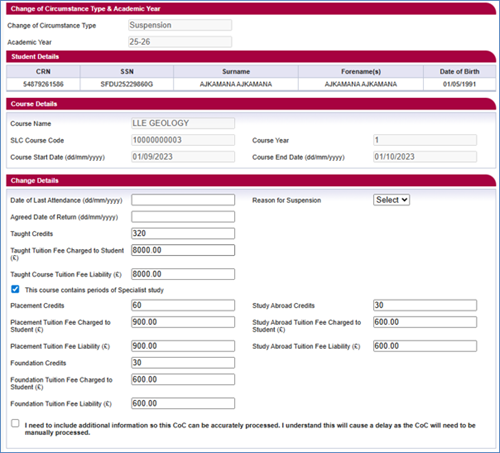
- Enter the Date of Last Attendance (last date of engagement). This is the last date when the student attended their course. We use this to process the student’s funding entitlement.
- Select a reason from the Reason for Suspension dropdown. The options are:
- Health
- Other
If you select Health the student’s maintenance support will automatically extend for up to 60 days. It is thus vital that you have evidence from the student. If the student’s suspension period is longer than 60 days, they must contact their award authority and send further evidence to support this.
- If you need to add additional information to this CoC, you must select the checkbox after the line saying, 'I need to include additional information so this CoC can be accurately processed. I understand that this will cause a delay as the CoC will need to be manually processed.'
- When you've entered all the details for the CoC, you must now select a contact for the CoC. This will be a registered person at your university or college whom we can contact about this CoC. Use the radio buttons within the Contact Details section to select the contact.
- Select Submit